Configuring the newsletter
If you wish to receive our newsletter in order to keep up to date with TuriTop Booking System's latest system improvements, uploads, and news, you need to accept so. To do this, go to your control panel and search for the Booking tab, then Company Info; close to the end, you'll see the following checkmark option:

Here, you only need to click on the checkbox, and in this way, we'll always stay in touch with you to keep you up to date with your Booking System.
 Keep in mind: We are not friends of SPAMMING, therefore we will only send you a maximum of one email per month with all the news related to your booking system and occasionally an offer also related to your TuriTop booking system.
Data Deletion: How to erase data?
You will have an erase button (eraser icon) that will help you delete your customer's data without erasing the booking from the system and thus losing stats or reports.
Step 1
You'll find this new button on any booking from your control panel Bookings tab in TuriTop. Choose a booking you wish to delete customers data from and click on this icon ![]() , as shown below:
, as shown below:

Step 2
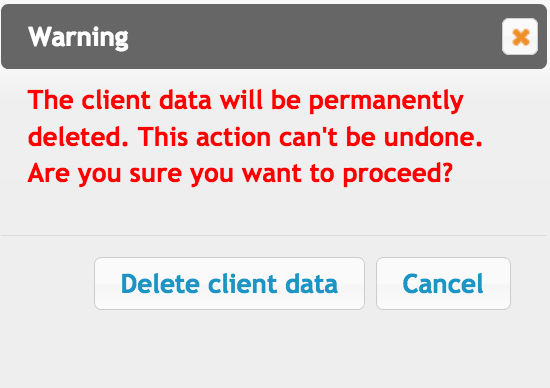
The system will prompt a warning asking you to delete client data since it's not undoable. Click on Delete client data:

Once this is done, all customer data will be erased from the booking. Now you'll have all bookings data, events and booking date, booking number, status, tickets, etc. It'll look this way:

Schedule data deletion: how to schedule?
There's an option that allows you to schedule data auto-erase, such as the one collected in the Booking Form, according to the time period you configure this after the end of the activity.
Go to your TuriTop's booking system control panel and search for the Booking tab, then Company Info; when you deploy the latter, almost in the end, you'll find the new "Delete customer info after" option box as shown below:

From here, you may schedule a range from one to five years or three and six months.
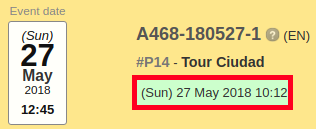
 Keep in mind: Customer's data will be deleted from the date of booking, not the event date. The latter is located in the booking with a green background.
Booking form: what can be added?
Adding your own Terms and conditions
You may insert a Terms and conditions field for your customers to accept in the booking form. You have two ways of doing this, the first is from the Company Tab and the other from the edit window of each service.
 Keep in mind: if you add this from the company tab, it'll be applied to all the new services you create.
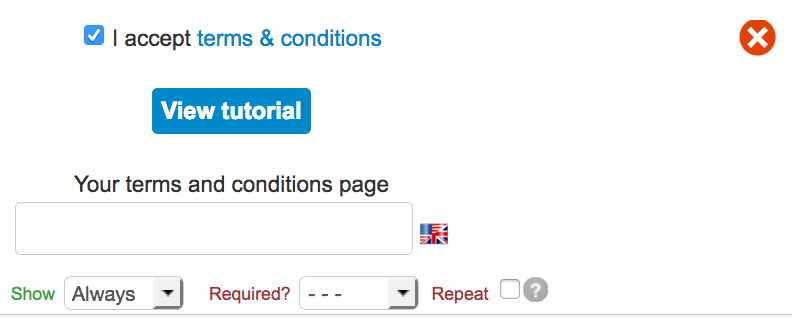
Firstly, if you haven't activated it yet, search for the add Terms and conditions button and click on it:

Once added, you just need to configure it. Paste here the URL or web address which hosts your Terms and conditions web site:

 Keep in mind: You can make this field mandatory in order to purchase if you select required as in widget.
To learn more about the Booking Form, please click here.
Add newsletter checkbox
You'll be able to insert a field for your customers to accept your newsletters. This will keep them up to date with your latest schedules changes, discounts, and promotions. Same as with Terms and conditions, explained above, you have two ways to insert it. Go back clicking here.
In the first place, search for the add button and click on it:

Once added, you'll have it on your booking form and you may make it mandatory as explained above:

Add a privacy policy and terms and conditions checkbox altogether
Currently, in the Booking Form, there's an item called Custom Checkbox; you can choose up to three of these. Basically, it's a checkbox that supports HTML and, therefore, can be used to add a checkbox for your customers to accept your privacy policy, terms of use and conditions, etc.
Go to the Service tab of your control panel. Select a service and, in the edit view, find "Booking form" and add a new custom checkbox:

After you add the box, copy the following code to your clipboard:
 Keep in mind: you need to replace both example URL's with your own.
 Once you have copied the code and replaced both URLs, paste it in the empty field of the new checkbox you've just created.

 Warning: the required? field should be set to Widget and the checkbox has to be un-clicked. In this way, it should work correctly.
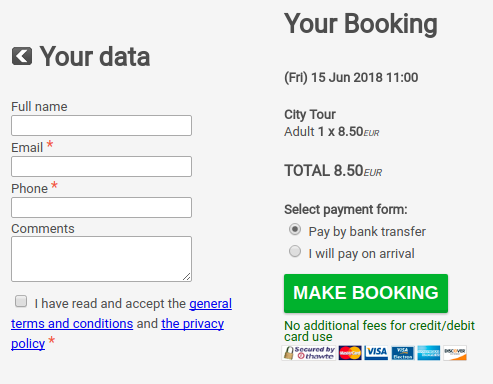
 Once installed, it'll look like this:

Hiding customer booking data
You can hide your customers' data from any agent or user. To activate it, go to your control panel >>> Company tab >>> Manage users. Once you have reached this point, select a user and scroll down till you reach Permissions. Click on the Hide booking client information checkmark:


Comments
0 comments
Please sign in to leave a comment.