
In this article, we will explain in a series of simple steps how to connect MyPOS with your TuriTop Booking System. If you don't have an account with MyPOS, go here.
MyPOS configuration
Sign in to your MyPOS account
Firstly you need to sign in to your account from myPOS.com.
Create Store
Step 1: Create a Store
This is a very important step because your store needs to be verified in order to process transactions higher than 200 € each. Please, for more information about Store creation and configuration click here.
To set up your store:
- Log in to your myPOS Account
- Go to menu Stores
- Click on "Create store" as shown on the screen below.
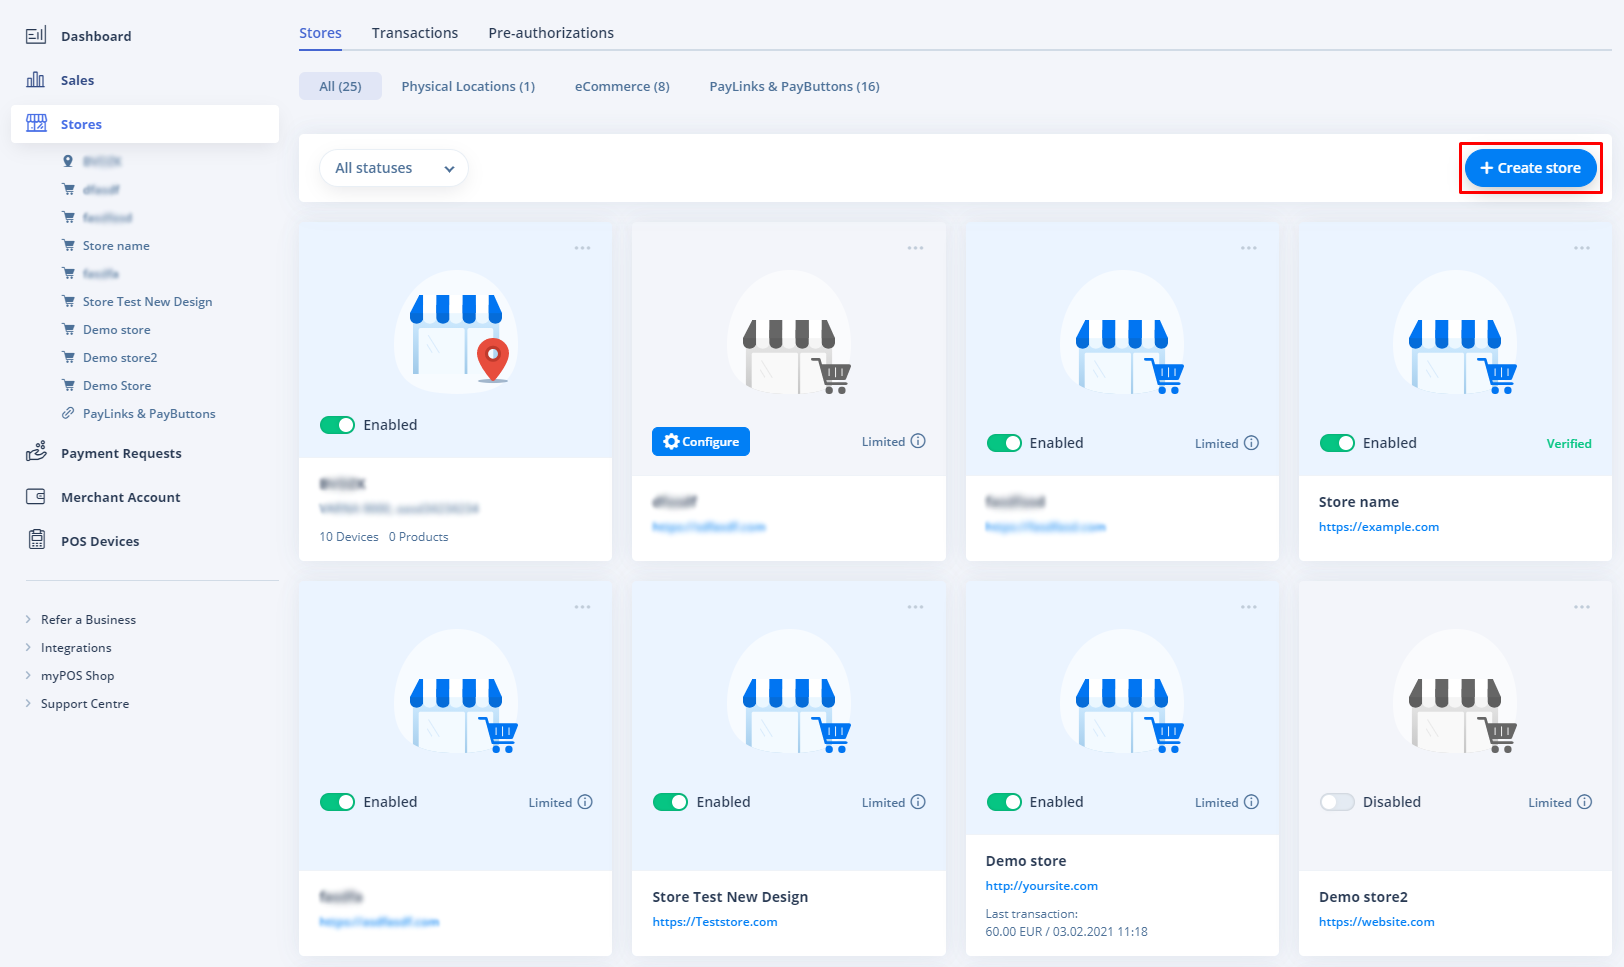
Stores need to be verified by myPOS and this process may take up to 5 business days. Until your online store is verified, you can still process transactions with certain limits. Learn more here.
Step 2: integration method
Select the method you want to integrate with your new online store. You can choose from one of the supported shopping carts. At this point, you'll need to select the myPOS Checkout API.

Step 3: Store Setup
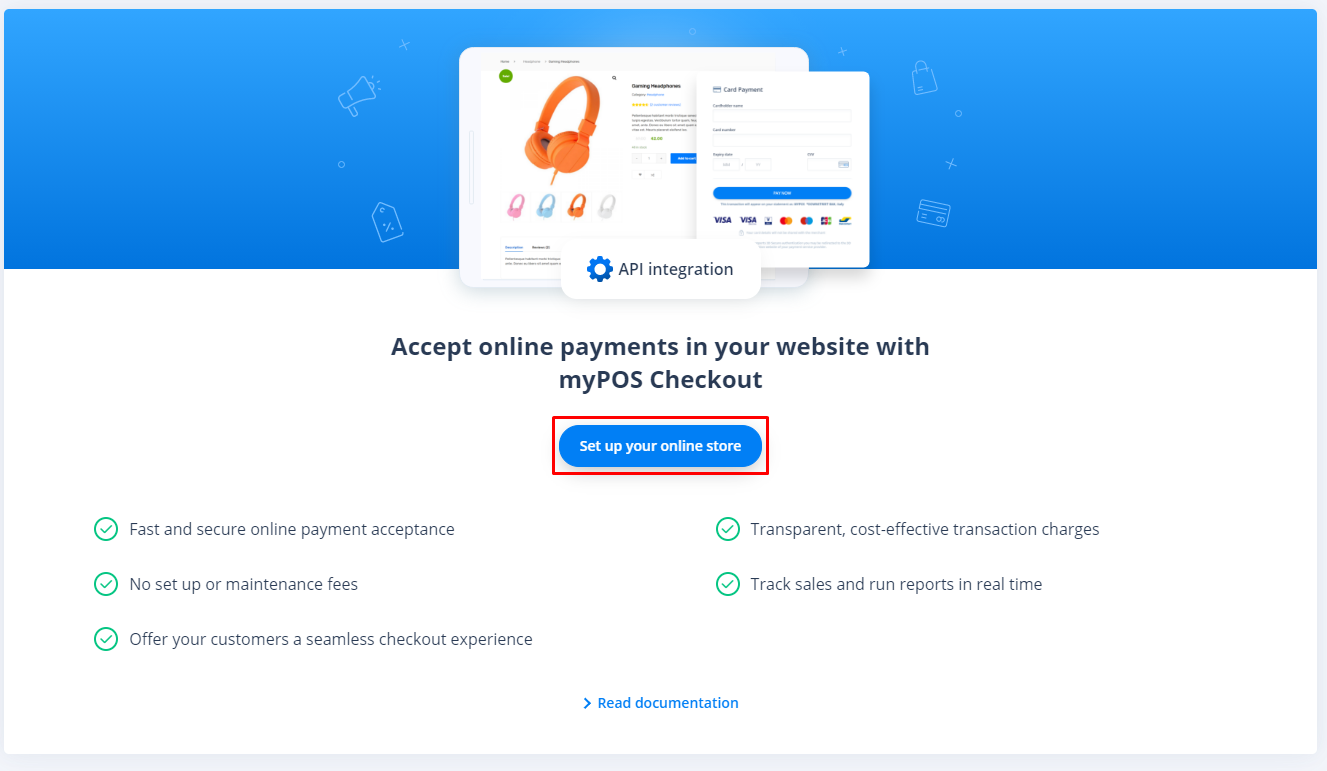
At this point, click on the "Set up your online store" button, as depicted below:
Step 4: store details
Fill all the fields needed to proceed:

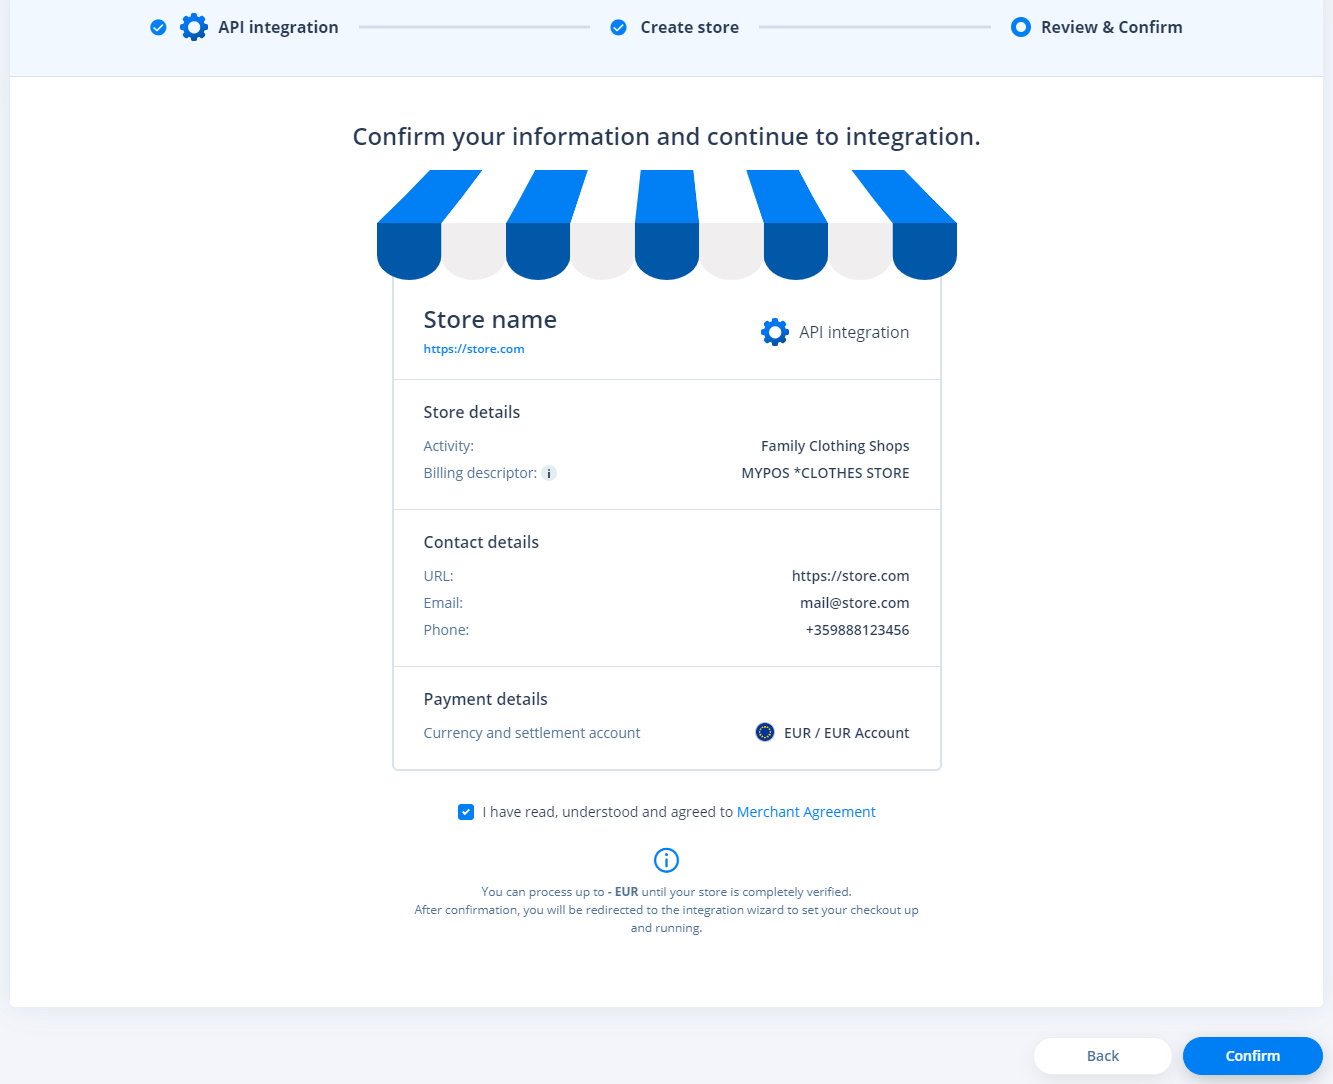
Step 5: review and confirm
Confirm all input made earlier to continue.
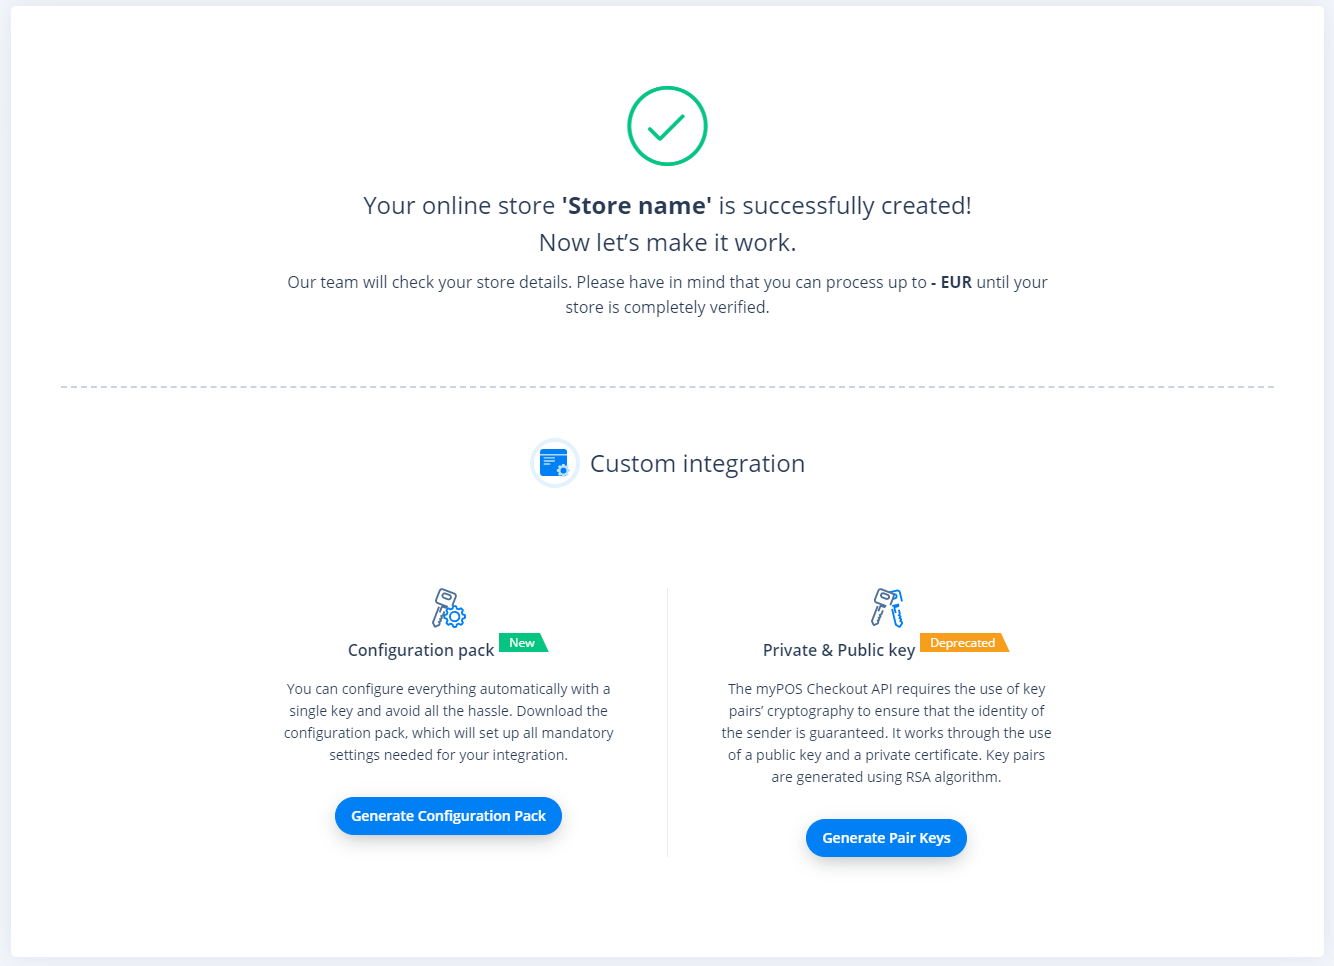
Your store is now created. You'll receive the following confirmation:
Configuring the new online store
This method is based on the generation of a key pair - Private key and Public Certificate. To use that method, please select Custom integration method -> Private & Public Key -> Generate Pair Keys.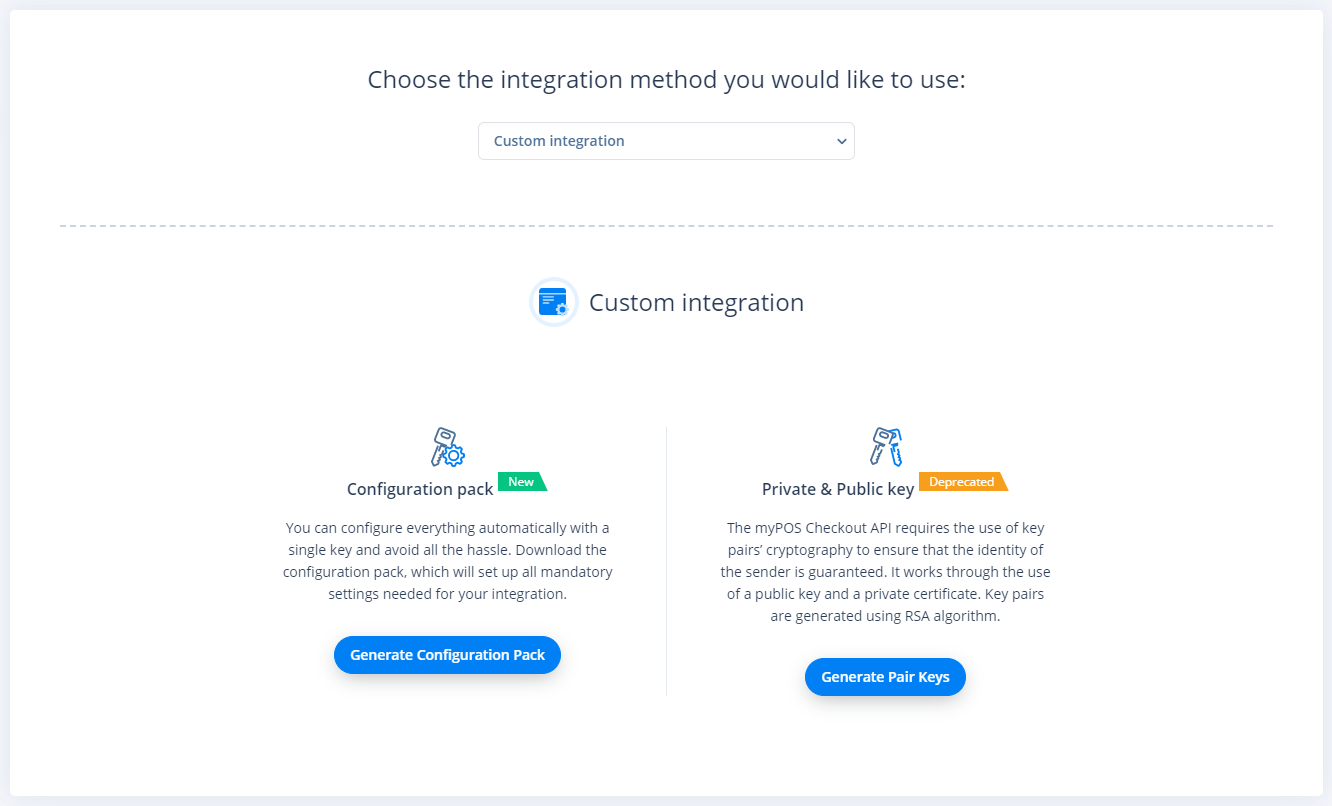
Setting the Public and Private Keys
You can use these keys in any type of integration but it is easier to use the Configuration Pack, which has all mandatory settings in one package.
When you choose the Key pair, it will generate the two keys which you need to paste into your code or plugin settings. Keep in mind that the Private key is shown only once and you need to store it securely. Should you lose it, you will need to generate a new key pair.
The myPOS Public Certificate is saved in the Integration tab and can be downloaded at any time if needed.
Please NOTE that you should also set the Key Index value in your settings. It is found in the Integration tab as well, and it indicates that you will be using this key pair with your integration.
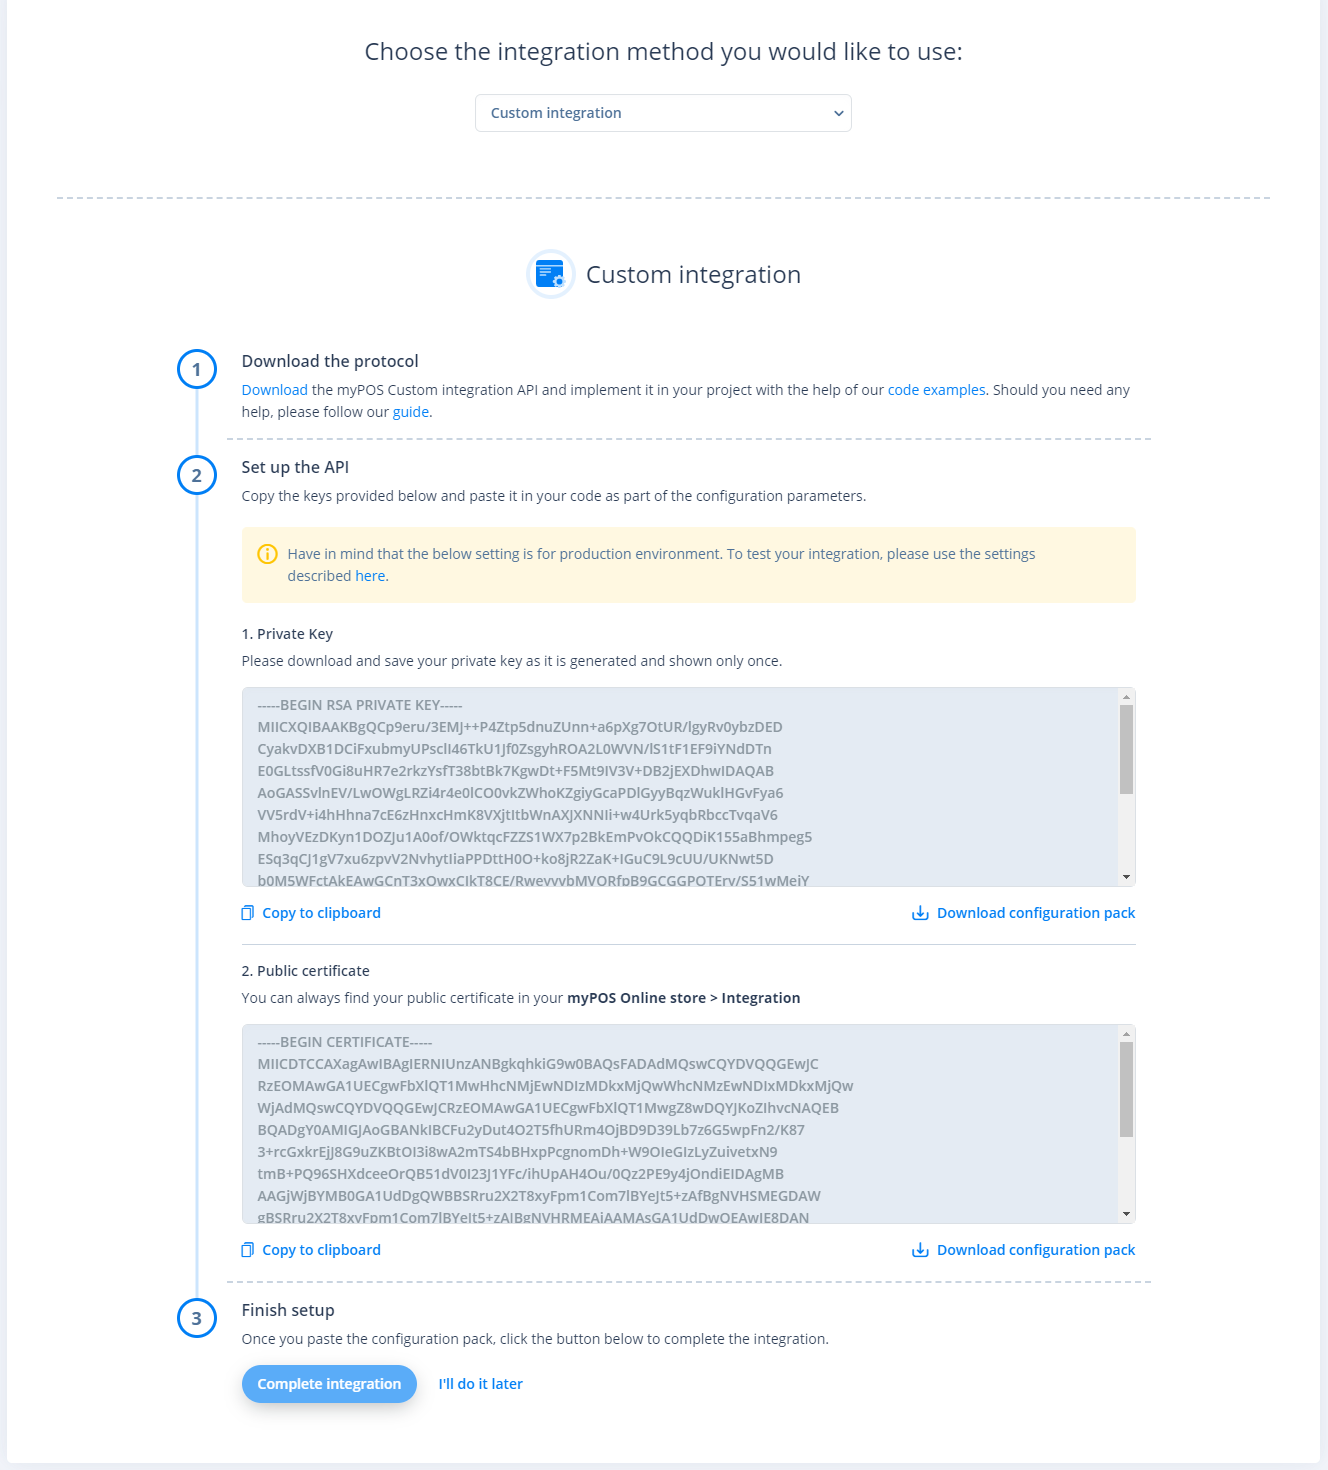
As a final step, after getting the key pair in the settings or your code, you need to set up the remaining parameters - Store ID and Client Number.
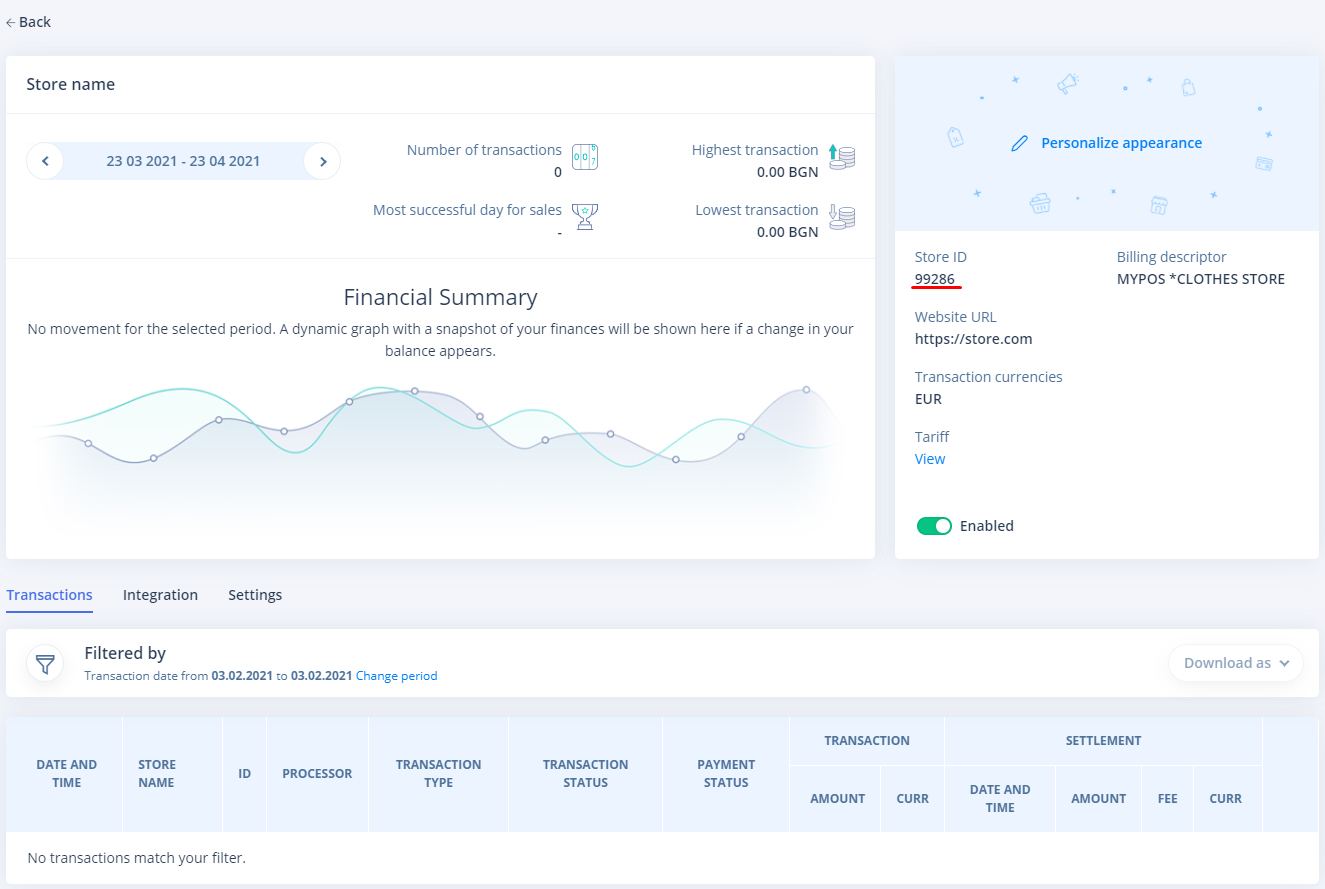
Store ID (SID) - You can find the Store ID in the general information for your online stores.
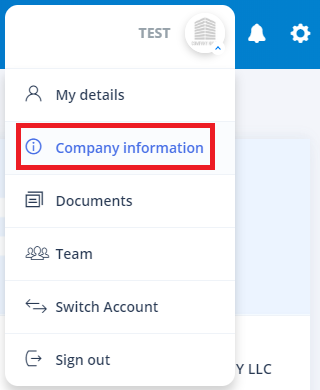
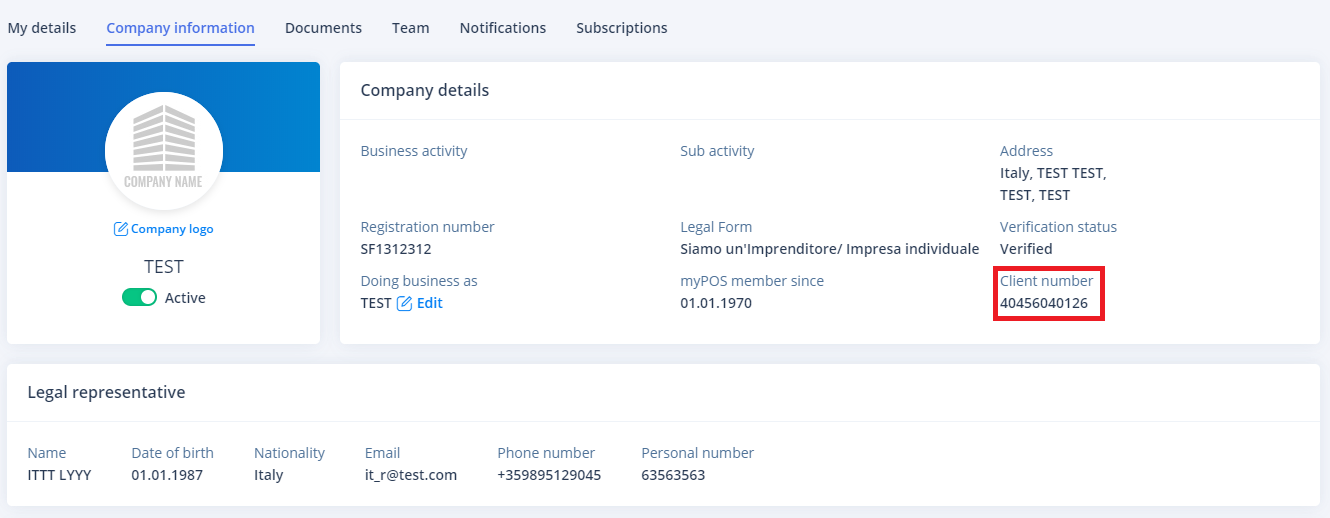
Client Number - You can find it in the Company information menu accessible from the top right corner of your myPOS account.
Once integrated, the new online store will be with the status “Enabled” and you are ready to start accepting payments.
You can Enable / Disable every online store at any time.
NOTE: Request URLs should be your domain name.
https://example.com/ - Correct
https://www.example.com/ - Correct
https://example.com:8000 - NOT Correct
https://example.com/any-page-name/ - NOT Correct
Before you continue, you will need the SID, the Wallet, the key index and the (*.txt) file generated in the steps above which contains the Public Certificate.
TuriTop Configuration
Step 1: myPOS configuration in TuriTop
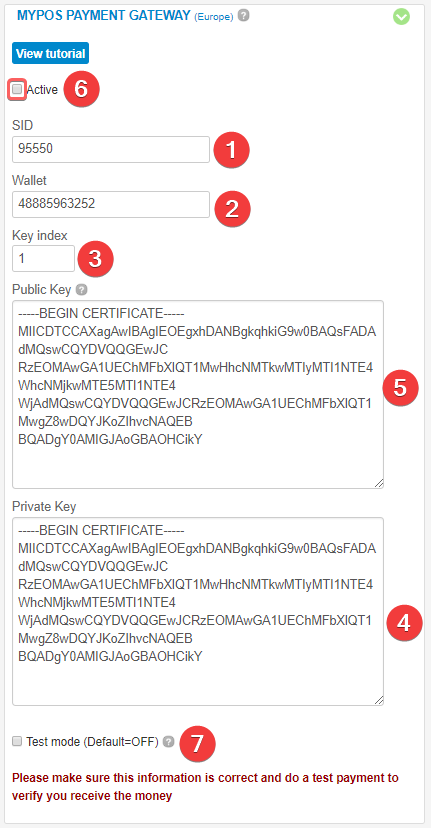
The first thing you need to do is log in to your TuriTop's dashboard and go to Company >>> Receiving Payments >>> myPOS. With all the elements mentioned in the previous section, follow these steps:
- Enter your SID code.
- Enter your Wallet Number.
- State your certificate's key index.
- Paste your Private key.
- Copy the contents of the previously generated Public Certificate (*.txt) file and paste it here.
- Click on Active to activate the service.
- Click here to activate the test mode of the payment gateway. When you have run all your tests, click again to deactivate.
Step 2: test environment
For testing purposes, make sure you activated the test mode explained in the 7th step of the previous section and, use the following data for a test purchase:
| Card Type | Card Number |
|---|---|
| VISA | 4006090000000007 |
| VISA | 4929131949828217 |
| VISA Electron | 4002880000000005 |
| MasterCard | 5326100000000004 |
| Maestro | 67032000000000001 |
| VPay | 4877000000000002 |
On the checkout page, you should enter just any name, 3 digit CVC code and the expiration date that is sometime in the future.
Example:
Name: TEST
CVC: 111
Expiry date: 12/2020
Make sure to deactivate the test mode so that you go live with the integration.
If you have any questions regarding myPOS integration, please contact TuriTop support from the more button of your control panel or myPOS support here.
Comments
0 comments
Please sign in to leave a comment.